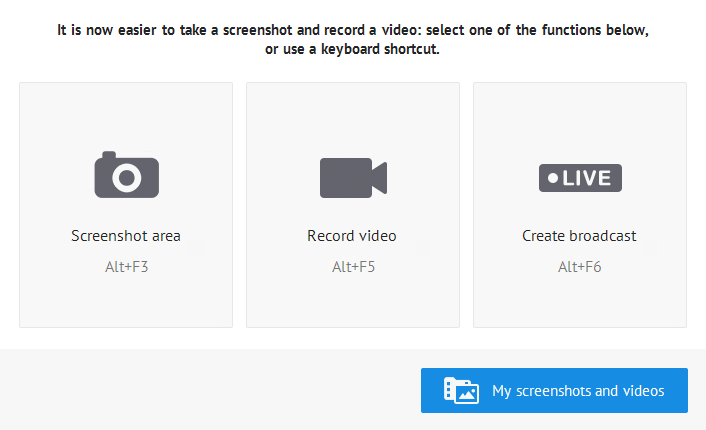
Are you interested in streaming or recording Armored Warfare? We have prepared a special tool for you.
With the Game Center Streaming and Video feature, sharing your epic gameplay is now easier than ever!
The tool allows you to create a live Armored Warfare broadcast using your Twitch account, record Armored Warfare videos and take epic screenshots.
Streaming
To start your live Armored Warfare broadcasting, please select the Create Broadcast option from the menu.
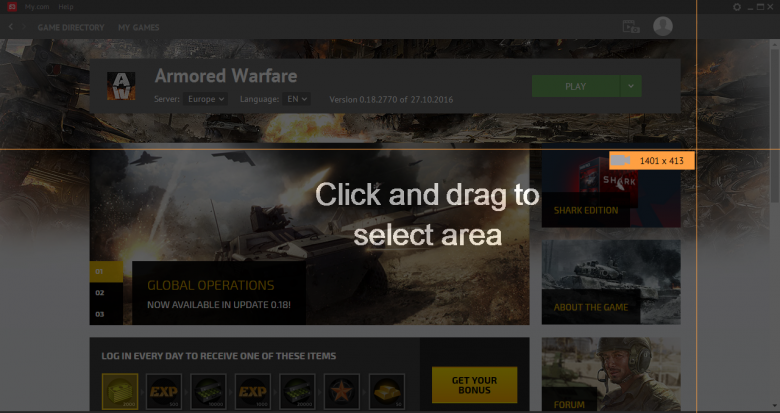
You will then be required to select the stream window size. The smaller the window, the lower the connection and performance requirements will be.
The broadcasting function requires an active Twitch account, a Youtube account or a Restream.io account. Please enter the Username and Password of your account to the MY.GAMES login window that appears. Select which service you want to use in the Configuration window (Twitch.tv is the default setting).

Upon successful login, press the Start Broadcast button to begin your live stream. You can also select the microphone and general volumes using the interface sliders and open the stream configuration window by pressing the cog button. Exit the feature by pressing the X button on the right side of the interface bar.
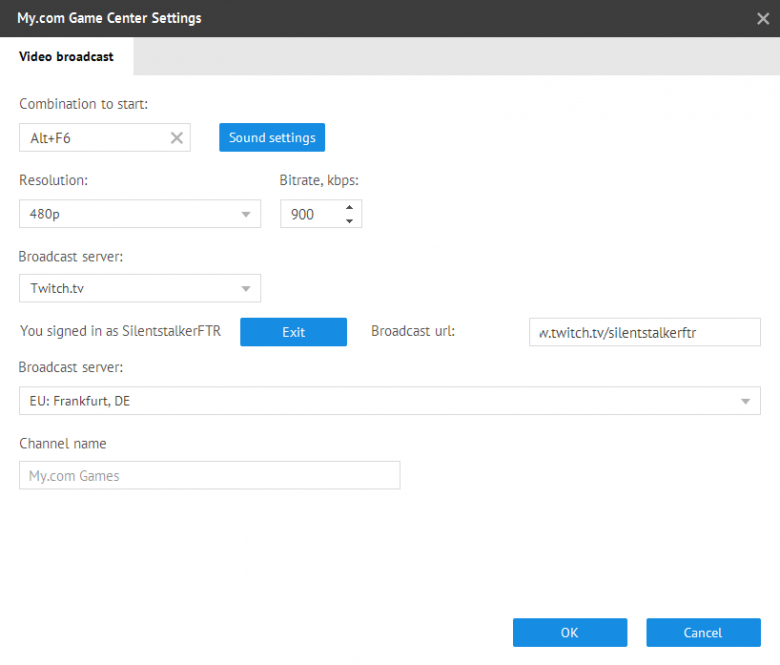
The Configuration window allows you to select:
- Sound settings – select your input device manually in case the microphone is not working
- Hotkey to start and end the stream
- Resolution and Bitrate – adjust per your connection's restrictions (please note that selecting a higher resolution and bitrate than your connection can handle will result in lags and image stuttering)
- Broadcast server – you can select from Twitch, Youtube and Restream.io streaming service as well as (in Twitch) select the server nearest to you manually
For Youtube and Restream.io broadcast, please follow the Configuration instructions carefully. A broadcast key has to be generated on the service's website and pasted to the appropriate area of the Configuration window to ensure the security of the stream. Once the configuration is finalized, press the OK button to continue.
Recording Videos
To start recording Armored Warfare videos, please select the Record Video option from the menu.
You will then be required to select the video window size. The smaller the window, the lower the performance and hard drive space requirements will be.
Upon selecting the video window size, recording will begin immediately. Please make sure you are already within the Armored Warfare client. Alternatively, press the Stop button to stop recording.

The image button opens up a window with the screenshots and videos files. All recorded videos and screenshots made using the Game Center feature will be added to this folder automatically and can be viewed or deleted. Please note that the folder where the files are saved can be changed in the Configuration window.
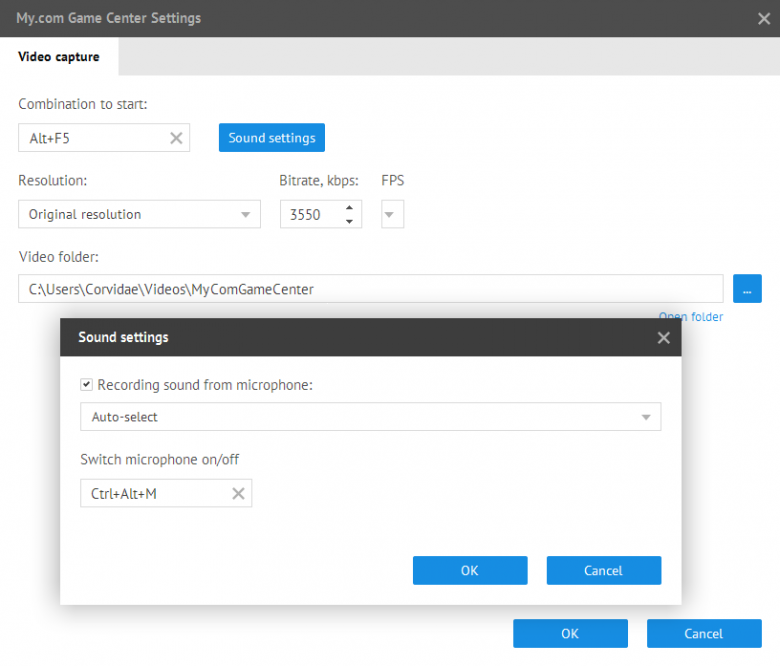
The Configuration window for video recording can be opened using the cog button. It allows you to select:
- Hotkey to start and end the recording
- Resolution, Bitrate and Frames per Second
- Video saving folder
Please make sure you have enough free drive space to save the recordings.
Saving Screenshots
To save an Armored Warfare screenshot, please select the Screenshot Area option from the menu.
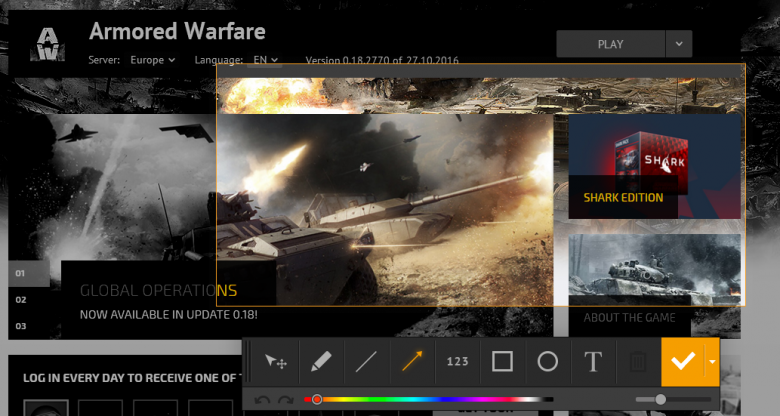
You will then be required to select the screenshot area, after which a simple screenshot editor opens up. The editor allows you to perform the following actions (from left to right):
- Move any object, created by this tool, around the screenshot area
- Use a freehand brush to mark areas of significance (color and thickness can be selected on the lower bar)
- Draw a straight line
- Draw an arrow (useful for pointing out objects on the screens for players to pay attention to)
- Insert a number to the screenshot area
- Insert a rectangle to the screenshot area
- Insert a circle to the screenshot area
- Insert simple text to the screenshot area
- Scrap the picture
- Save the picture
The color and thickness of all objects can be selected on the lower bar. Number, rectangle, circle and text features can also have optional background.
The screenshot is saved to a pre-defined folder, which can be selected in the Configuration window.
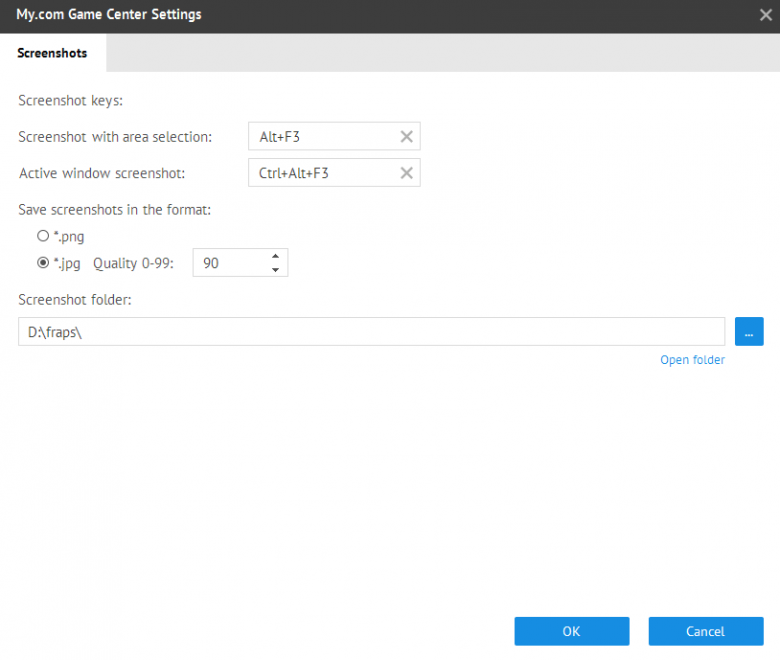
The Configuration window for video recording can be opened by pressing the downward arrow right of the Save button and selecting Settings from the menu. It allows you to select:
- Hotkey to take an area screenshot or a screenshot of an entire active window
- Screenshot format (.png or .jpg)
- Picture quality
- Screenshot saving folder
Please note that the screenshot saving folder can be different from the video saving folder.
We hope you enjoy this feature and we'll see you on the battlefield!