Commanders!
Update 0.20.3831 introduced the third Global Operations map – Ghost Field. Compared to the previous two maps, there are some major significant differences to it but players familiar with the PvP version will quickly find themselves at home on it.
In Global Operations, two teams of 15 battle each other for control of an area. Each team has a pool of Tickets. Performing rewarded actions, such as:
- Capturing and holding objectives
- Killing enemy vehicles
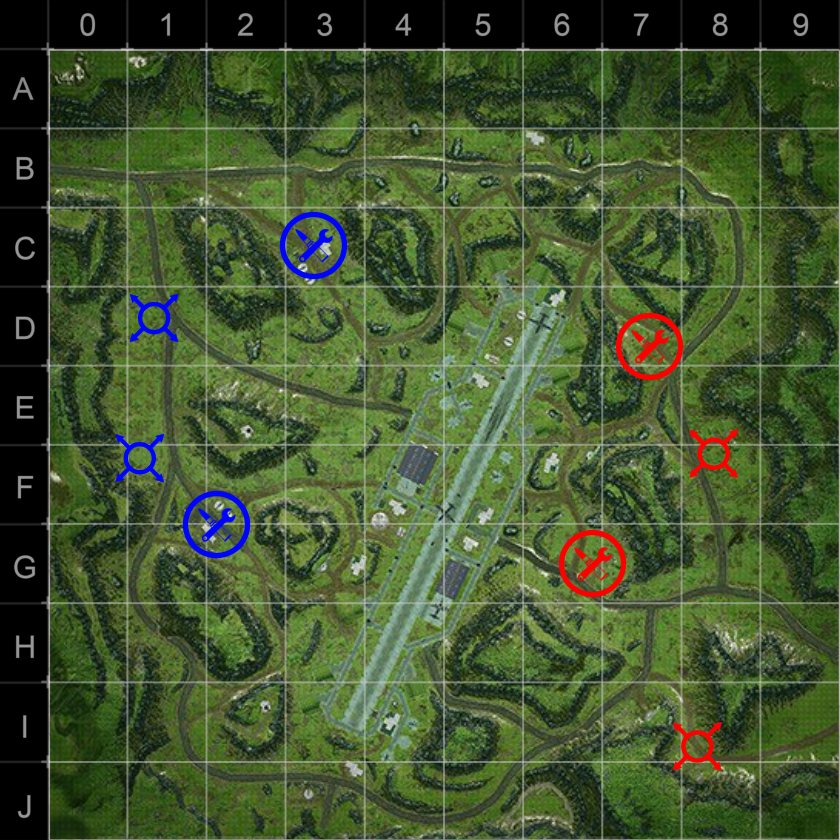
Reduces the enemy team's Ticket pool. The team that loses all its Tickets first loses. On the Ghost Field map, both teams start with 2000 Tickets. The spawn points are located on the west side and the east side of the map with repair posts half-way between the spawns and the center of the battlefield, allowing for a fast retreat and repair.
Unlike the standard PvP mode, when players get destroyed in Global Operations they can respawn on one of the three spawn points per team. Respawning grants you 15 seconds of invulnerability.
Additionally, spawn points and repair points are protected by powerful AI bunkers. These bunkers make it impossible for the enemy team to effectively prevent respawned players from joining the battle. Please note that you can only select one vehicle for the entire battle, it is not possible to respawn in a different vehicles.
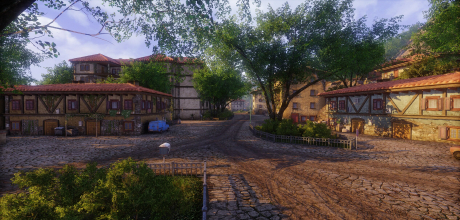
The Ghost Field map takes you to Bulgaria, where you have to fight an enemy faction over the remains of the old Bezmer air-base. This map features several Wildcards known from the other Global Operations maps that are already available, specifically:
- Recon UAV
- Airstrike (Tu-22M3 Bombers)
- Bunker Deployment
The overall use and principles of the Wildcards are described in our Wildcard article.
Layout and Phases
The map is a mountainous one, offering plenty of cover as well as the opportunity to cleverly use high ground. The general shape of the map resembles a cauldron with roads covering the rim and with the Bezmer military airfield located in the middle below the spawn point level – that’s where the thickest fighting happens.
The battle has two phases, the progress of which can be tracked by:
- Watching the Objective Indicators below the timer (color changes depending on the objective owner)
- Watching the Phase counter in the circle above the timer (each section of the circle represents a different phase)
The Objectives change in each Phase.
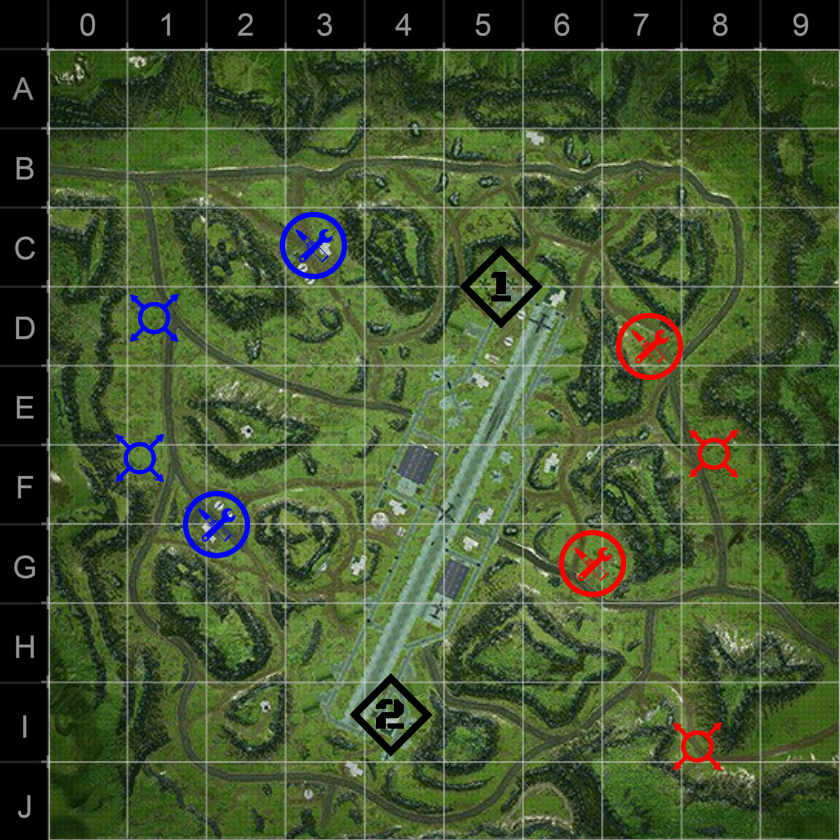
Phase 1 of the battle begins with 15 minutes, 2000 Tickets per team and the following objectives:
- Northern Base (designated Objective 1)
- Southern Base (designated Objective 2)
Both ends of the base are roughly symmetrical and consist of a large number of buildings. They can generally be fired at only by moving to the rim of the high ground surrounding the base or by firing directly from the central (or even the opposite) part of the base area. The best cover is provided by two massive hangars (one on each side of the runway that leads from south-west to north-east). These cannot be destroyed and serve as excellent staging points for further attacks. The runway and the surrounding areas are littered with various wrecks that, while destructible, provide some cover for an advance in both directions.
The safest approach to each objective by using one of the approaches that leads towards them from the north for the northern objective (sectors C5 and C6) or from the south for the southern objective (sector J4 or I3). Keep in mind, however, that the enemy will likely be attempting the same thing, often resulting in an intensive short-range firefight in those areas. Long-range vehicles can attempt to carefully approach through the middle, sniping at any spotted enemies while carefully leaving their retreat paths open. Situational awareness is the key – one of the most dangerous tactics is for the enemy fast vehicles to sneak up behind you, putting themselves between your position and your base. Such a maneuver, while risky, usually ends in the destruction of any players caught off-guard.
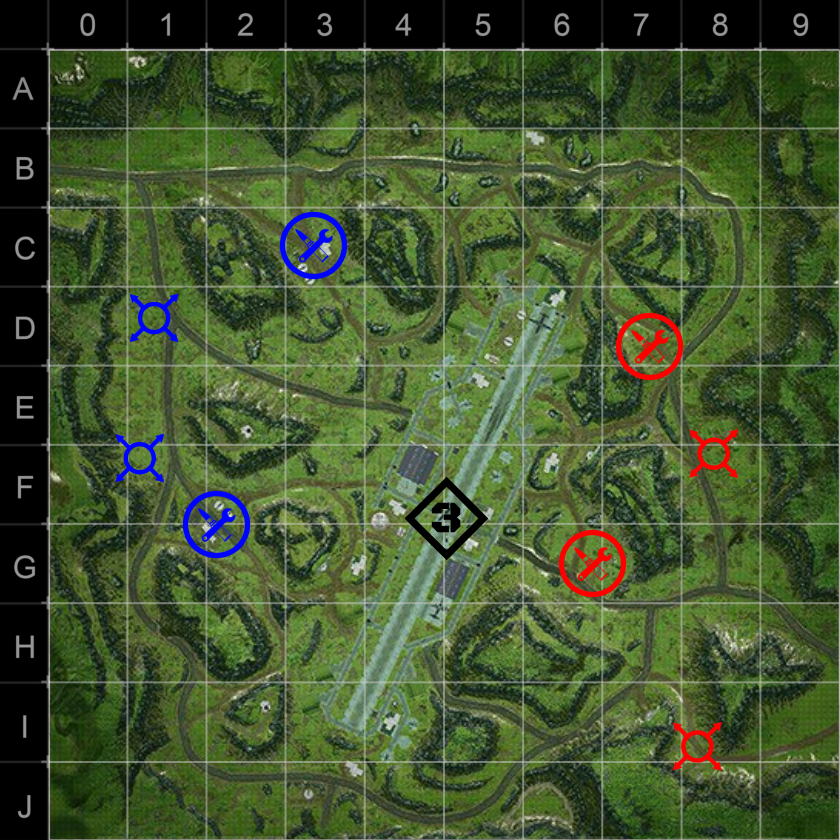
Phase 2 of the battle begins roughly three minutes into the battle. The objectives are reduced to a single point:
- Runway (designated Objective 3)
To make matters more complicated, a thick fog rolls in, significantly reducing the visibility in the central area. This results in brutal short-range battles around the center. Vehicles with thin armor (especially those with low mobility) are advised not to enter the central area as being spotted will immediately put you in the crosshairs of every enemy vehicle on the battlefield. Only main battle tanks can often withstand such punishment, any other class has to rely on speed and immediately seek cover.
Support vehicles such as missile carriers or Tank Destroyers have to stay out of the central are at all costs. Instead, they should provide cover from the outskirts of the base. Once again, players have to pay attention to attempted flanking maneuvers. A well-executed encirclement using the roads on the edges of the map can result in massive point loss for the surrounded team, resulting in a swift victory for the flankers. The second phase lasts until the end of the battle.
The Ghost Field is only one of the maps we are overhauling to work in the Global Operations mode.
We hope that you enjoy it and we'll see you on the battlefield!