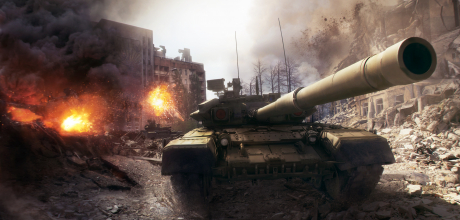
Commanders!
Update 0.19 introduces our second Global Operations map – Barren Divide! This map uses the same elements as the previous map, Desert Crossing, but its layout is fundamentally different. But first, let's take a look at the basics of Global Operations.
In Global Operations, two teams of 15 battle each other for control of an area. Each team has a pool of Tickets. Performing rewarded actions, such as:
- Capturing and holding objectives
- Killing enemy vehicles
- Killing AI vehicles
Reducing the enemy team's Ticket pool. The team that loses all its Tickets first loses.
On the Barren Divide map, each team starts with 3000 Tickets. Battle duration is limited to 15 minutes. Both teams are split into three groups, each starting near one of the three spawn points on the map (the cross icon) either in the south-west or the north-east. Unlike the Desert Crossing map, the three groups are relatively close to each other, making it easier to switch your target side even if you spawn further away from it.
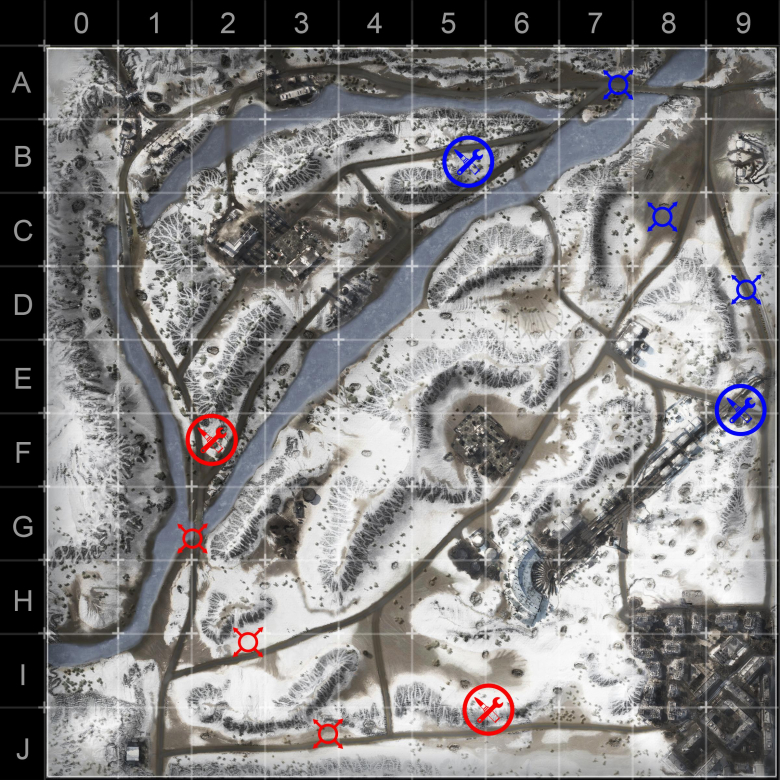
During the battle, both teams can use their side's repair posts, which are marked with a crossed wrench and bullet. Use these points to repair and rearm your vehicle!
Unlike the standard PvP mode, when players get destroyed in Global Operations they can respawn on one of the three spawn points per team. Respawning grants you 15 seconds of invulnerability. Additionally, spawn points and repair points are protected by powerful AI bunkers. These bunkers make it impossible for the enemy team to effectively prevent respawned players from joining the battle. Please note that you can only select one vehicle for the entire battle, it is not possible to respawn in a different vehicle. Last but not least, Wildcards appear randomly through the match.
Phases
The battle has three Phases, the progress of which can be tracked by:
- Watching the Objective Indicators below the timer (color changes depending on the objective owner)
- Watching the Phase counter in the circle above the timer (each section of the circle represents a different phase)
The Objectives change in each Phase. The area is also littered with AI opponents, which respawn at the beginning of each Phase.
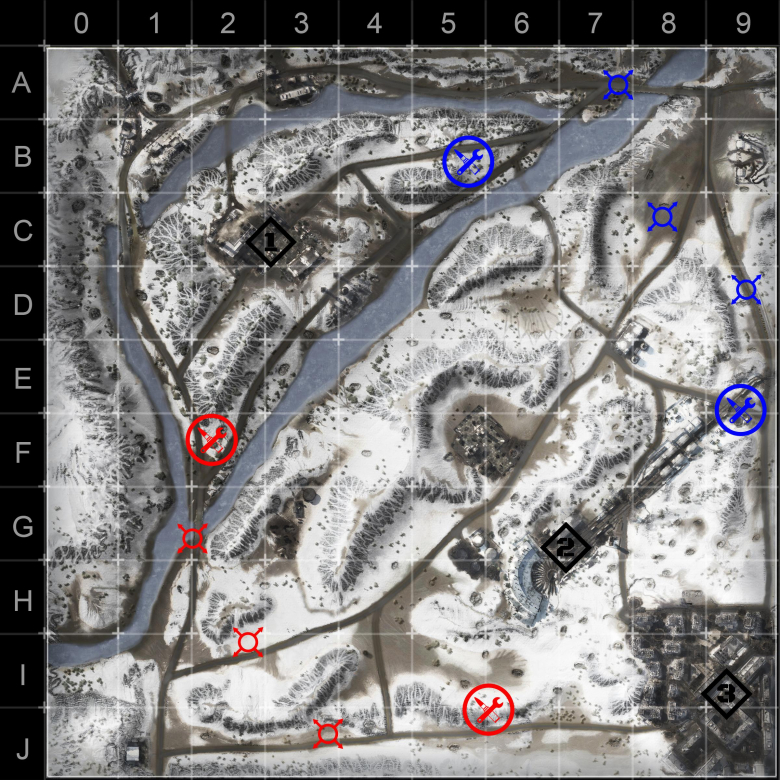
Phase 1 of the battle begins with 15 minutes, 3000 Tickets per team and the following objectives:
- Refinery (designated Objective 1)
- Railway Depot (designated Objective 2)
- Main Street (designated Objective 3)
The Refinery is an enclosed area with towering buildings providing plenty of cover. The road leading through it, however, is very exposed and players attempting to capture the area can quickly find themselves under fire from the outlying hills on the river island. High-Tier snipers especially are deadly and caution must be exercised. Of the three Phase 1 objectives, this one is the most suitable for fast vehicles such as AFVs and Light Tanks.
The Depot area faces approximately the same situation. There is cover to hide behind but caution has to be exercised when entering it as unwary players can be targeted by mid- to long-range fire, especially from the north-east. Fortunately, wrecks and other debris litter the area, providing sufficient cover opportunities for all but the slowest of tanks.
Finally, the south-east corner of the map is occupied by the area with most cover, the city. In Phase 1, the objective is to capture its main street. Expect brutal close-range fighting with plenty of cover, especially suitable to the heaviest vehicles of Armored Warfare – Main Battle Tanks and heavy IFVs such as the T-15 and the Terminator series. Be warned – this area is not suitable for light vehicles that cannot withstand torrents of enemy fire for long.
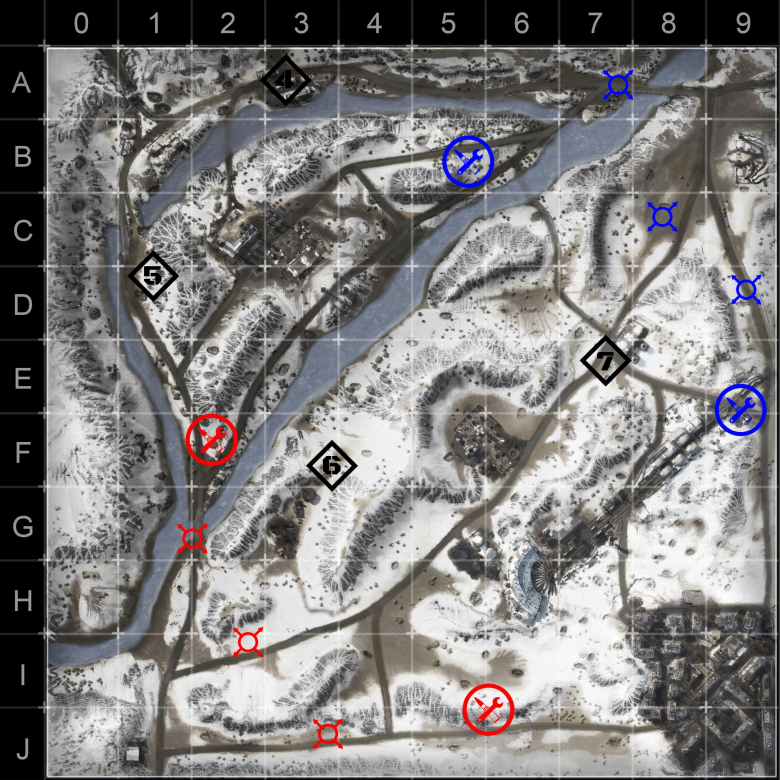
Phase 2 is activated five minutes into the battle (with 10:00 remaining on the timer). In this phase, the brunt of the fighting moves north as the objectives change to the following:
- Village (designated Objective 4)
- Bridge (designated Objective 5)
- Storage Facility (designated Objective 6)
- Oil Storage (designated Objective 7)
The Village in the north is an exposed area that's optimal for AFVs and Light Tank lightning strikes. It is somewhat difficult to hold for the south-west team due to its proximity to one of the enemy spawn points and the road that leads towards it, allowing the defenders to quickly re-deploy. Additionally, the village is extremely vulnerable to sniping from the hills that surround the north of the Phase 1 objective, the Refinery. The best tactic for the members of the south-west team brave enough to attempt to capture it is to stay in motion or, if possible, to put enough cover between them and the hills to the south.
The Bridge area is also very exposed and the north-east team faces the same issues as the opposite team does in the Village. One difference is the relative proximity of the Storage Facility objective, which usually means that there's a higher chance of the enemy team's reinforcements coming from the south once the objective is secure. Advancing from the north using the road is not recommended – only the most nimble vehicles can survive the murderous barrage from the defenders that are usually positioned on the hills or to south of the bridge. A better approach is to take the Refinery area and use the hills and buildings there for extra cover.
Despite its relative openness, the Storage Facility area is a shorter-range battle zone thanks to the hills surrounding it. This area is also very close to the south-west team's spawn points and repair facility, making it very difficult for the north-west team to take it. It is, however, quite suitable for a fast vehicle diversionary attack to relieve the pressure on other beleaguered objectives as the south-west team usually reacts quickly to such threats near their base of operations. But do not pursue fleeing enemy forces as the risk of running into the bunkers protecting the base is quite high.
To a large extent, the Oil Storage is to the north-west team what the Storage Facility is to the south-west one. It is generally close to the north-west spawn points and taking it is quite difficult for the south-west team. The best way of approaching it is to simply select the least-defended area on the map and pass through there, but do not let yourselves be flanked and cut off from the main body of your team, such ventures rarely end well.

The final phase of battle, Phase 3, activates nine minutes into the battle with 6:00 remaining on the timer. In contrast to the Desert Crossing map, visibility does not change, but the objectives shift once again to:
- Roadblock (designated Objective 8)
- Radar and Communications Facility (designated Objective 9)
- City Streets (designated Objective 10)
Phase 3 will see your forces stretched all across the map and it's common for both teams to only truly focus on two out of three objectives, making the third (usually the Roadblock) ripe for the taking if you are driving an agile and fast vehicle – but beware, you might end up fighting enemy individuals who had the same idea!
The Roadblock highway area is fairly remote and is detached from the rest of the map by numerous obstacles. The empty cars and buildings to the south of the point provide plenty of cover although the team that controls the Refinery can find a few good positions that can be used to fire at that area.
Further to the south-east lies the Radar and Communication Facility, which usually becomes the hottest zone on the map once the battle reaches Phase 3 thanks to its position near the center of the map. The area is generally open and attracts vehicles of all classes. One of the biggest dangers of this area is the deployment of the Bomber Wildcard. Wildcards generally appear more often in Phase 3 and a well-placed bomber strike can knock out multiple opponents, quickly shifting the battle in your favor – or against you!
Last but not least, the urban area in the south-east provides a lot of cover and is ideally suited for Main Battle Tanks. It's worth noting that losing the center can lead to a quick flanking maneuver that leaves the forces in the city surrounded, making it extremely important to hold the Radar and Communication Facility.
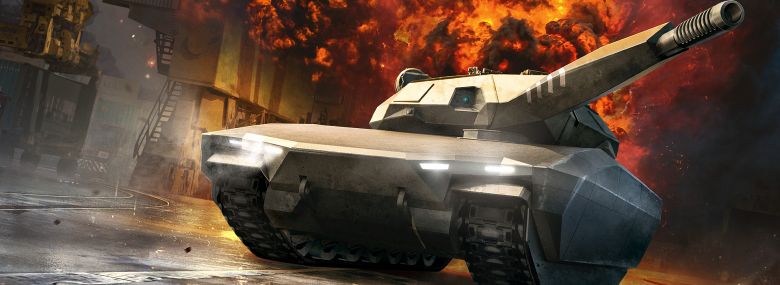
We hope you enjoy this map coming in Update 0.19 on April 20 and we'll see you on the battlefield!